Official Luthiers Forum! http://www-.luthiersforum.com/forum/ |
|
1955 Martin D-28 Repair http://www-.luthiersforum.com/forum/viewtopic.php?f=10137&t=51283 |
Page 1 of 2 |
Author: | DanKirkland [ Tue Nov 27, 2018 8:37 pm ] |
Post subject: | 1955 Martin D-28 Repair |
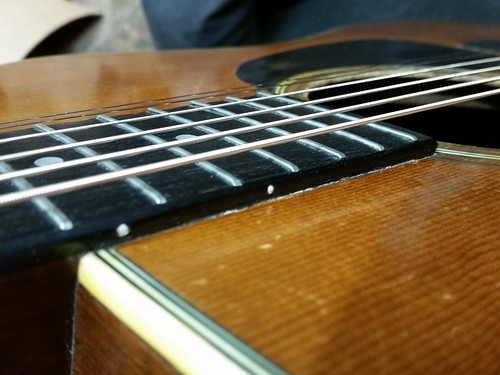
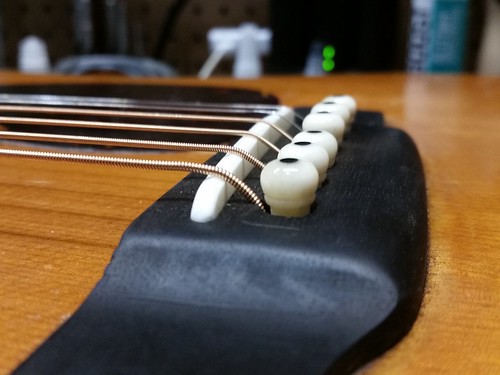
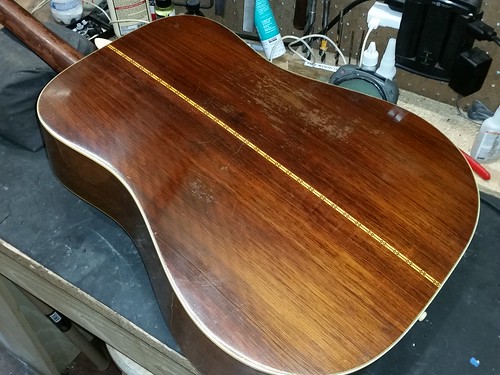
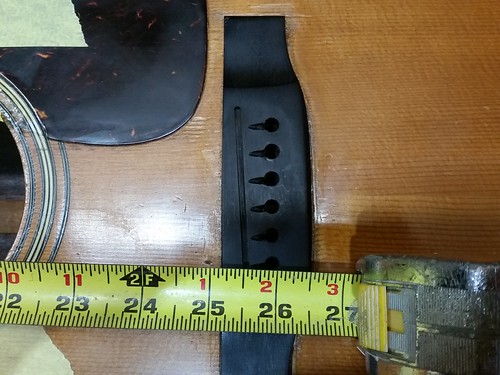
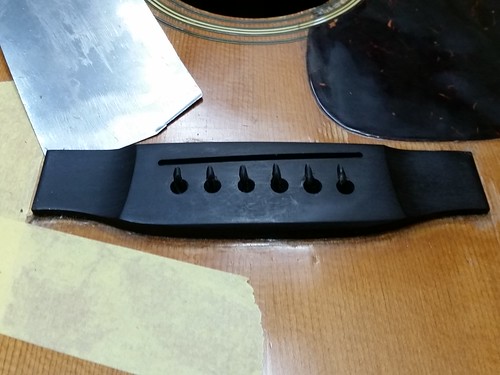
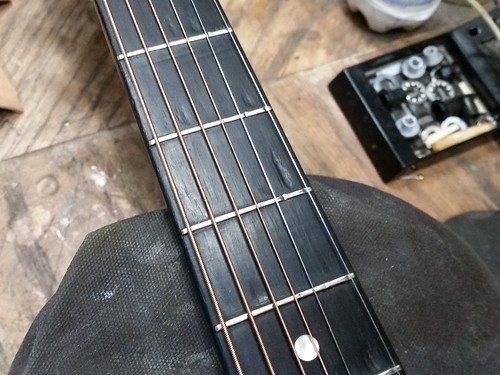
This one came in this weekend and I got to look at it today. This is going to be interesting. The BRW on this one is STUNNINGLY straight grained. I can't even take a good picture of it, really nice stuff. This one is badly in need of a neck reset as well as some other work. The action however is not the reason the owner brought it to me. Some years ago the owner had some work done on it by a local guy. The previous guy had convinced the owner that the bridge was not in the right spot and that it needed to be replaced. The owner was not happy with the work that was done because of the following reasons. The bridge that was installed was massively thick and just way too tall. The owner also said that the guitar as a whole is just wonky when it comes to intonation. And to add insult to injury to a beautiful guitar. The previous tech guy glued the bridge on not only in the wrong place but he mis-aligned the pin holes. So he just ramped the strings at an angle to fix the problem. All that misalignment of course rendered the guitar a hopelessly out of tune mess. And to make matters worse, there are traces of Titebond III or some other kind of instant cement all around the base of the bridge as well as the fingerboard extension. I sincerely hope that it is not TIII as that would make my job much more complicated. The traces around the fingerboard extension also make me worried a bit. He did do one thing right, he added a slight overlay on the bridge plate to help the ball ends from chewing it up too much. Not bad on that part. Everything else, I want to slap him. The ball ends have since chewed through the repair and into the bridge itself so there is some work to be done. Although I have to say that I was expecting the belly to be worse than it is, likely that the overly thick bridge acted like a giant clamp and kept everything really flat. Frets are pretty much worn through, this guy plays alot. So the work that needs to be done is mostly the usual. Neck reset, new bridge, new bridge plate, possibly some other top reinforcement once I see how bad things are with the bridge/belly area. The owner really loves this instrument and I could read that he was extremely upset with the previous work (I doubt I'd be upset, raging is more like it). However I am very happy that he wants to get the guitar up to speed again. These 50s Martins are a joy to play and hear when they are back in playable form. Tomorrow I'll do some more probing of the bridge before I do anything else. If I can figure out what he used for the bridge then it's likely that he used the same glue for the neck. Here's to hoping that it's not Titebond III. More to come later. |
Author: | Freeman [ Tue Nov 27, 2018 8:41 pm ] |
Post subject: | Re: 1955 Martin D-28 Repair |
I'll enjoy watching this. I knew that a lot of '70's have their bridge in the wrong place but I didn't think that was an issue with earlier ones. Its good to know its going to be done right. |
Author: | Smylight [ Tue Nov 27, 2018 10:18 pm ] |
Post subject: | Re: 1955 Martin D-28 Repair |
Dan, you got my attention. Pierre Castonguay |
Author: | dpetrzelka [ Wed Nov 28, 2018 12:02 am ] |
Post subject: | Re: 1955 Martin D-28 Repair |
Following closely - such a beautiful instrument, in need of the proper TLC. |
Author: | Mark Mc [ Wed Nov 28, 2018 6:30 am ] |
Post subject: | Re: 1955 Martin D-28 Repair |
Yes, some days it must feel like fun to come to work! |
Author: | DanKirkland [ Wed Nov 28, 2018 10:01 pm ] |
Post subject: | Re: 1955 Martin D-28 Repair |
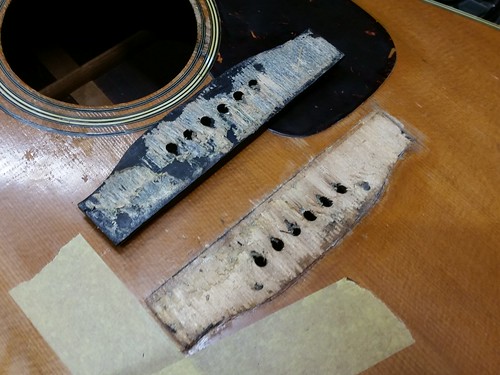
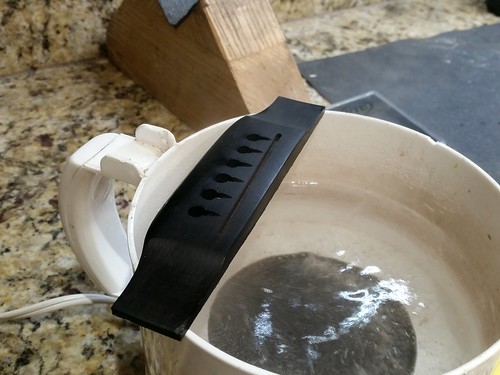
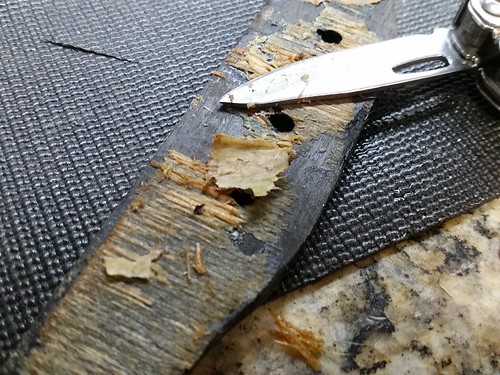
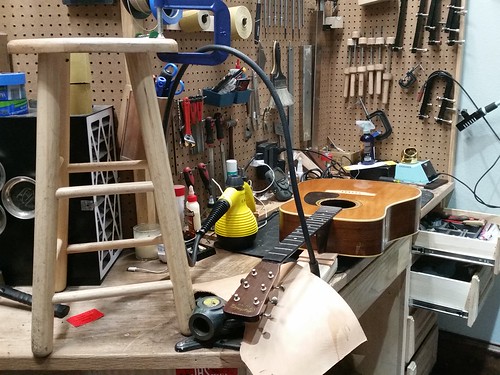
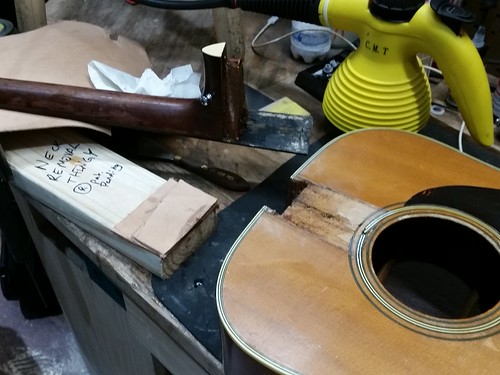
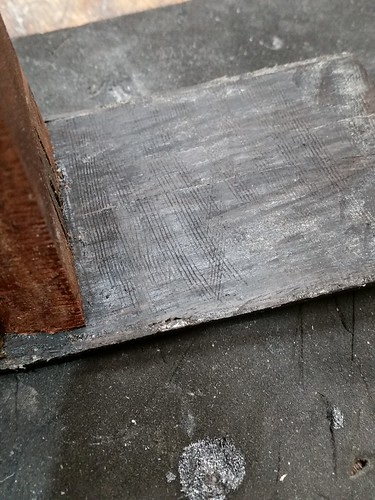
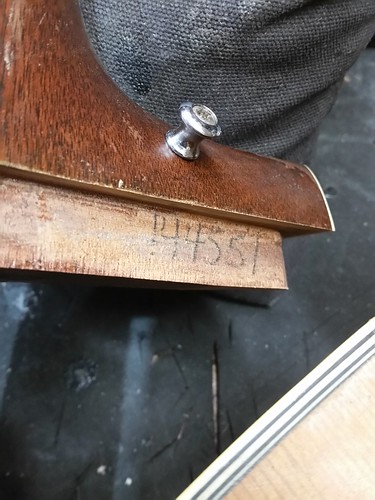
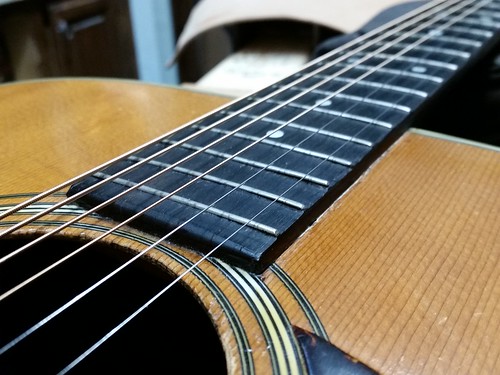
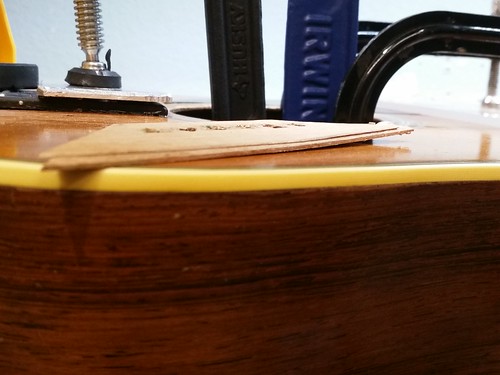
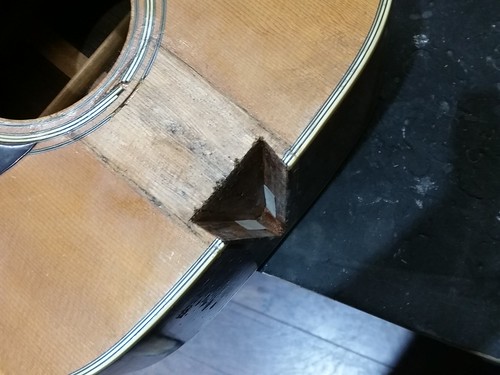
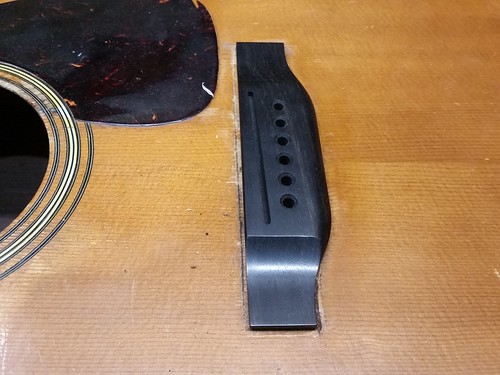
First steps. So this bridge was the first objective to tackle. It had many issues. Aside from the alignment issues it was clear that it had been glued on with some extremely tough glue. A friend had mentioned about possibly routing the bridge off. That is a great suggestion for cases like this but I've never done it before and I'd like to experiment with it on another guitar that is not this one. Now I do realize that is a weird thing to say considering how I ended up getting this thing off. This bridge was glued HARD to the top. My initial attempts were using the typical heat/pallet knife combo to get it off. The progress was really tough and I could feel that the heat had some effect but not much on the glue. The bridge was glued far enough forward that there was a line of exposed unfinished spruce on the top. I decided to use a hammer and chisel to "pop" the bridge off the top. The exposed spruce gave me a great safety measure to not damage any of the finish. If there was finish in this area I would NOT have used this method. Two solid hits in the middle and one hit on each wing. And I could easily slide a pallet knife under the bridge with hardly any effort. A tiny bit of work later and pop she goes. And holy crap was this thing THICK with glue. I see this alot honestly, I guess more glue = more better in some circles. Not a textbook removal, but it's off. The top is actually more bellied now? I guess the bridge was really putting alot of pressure in that area. I should say, I do NOT recommend that method unless you have a margin for error like I did here. It works though so I can't knock it too hard. So with the bridge out of the way I decided to see if this glue will break up sufficiently with steam. At this point I was assuming that the same glue was used for the neck. Holding the bridge over the kettle at a boil showed me that it does indeed break up but it took a LONG time to get to the point where I could just scrape it off. So armed with this new information I decided to remove the neck. Some weird things with the fingerboard extension. There was filler (finish?) all the way around the edge of the extension, I simply cut through it, there was a thick line of filler all around the edge of the extension. The filler was what I had initially though was contact cement which would've made for a very bad day. Using heat I was able to get the extension free of the body, it's clear that this had been monkeyed with before as there is filler and a small layer of finish all the way around. My effective yet weird neck removal setup. I lightly push the heel on the leather pads that I've attached to the block in the vise. Simple and it keeps me from having to tighten a screw or anything like on a jig. Plus it lets me use whatever level of pressure I feel necessary to remove the neck. I usually steam in spurts at a time and then gently move the neck out of the dovetail. This is when my rough day became a GREAT day. The neck popped off after maybe 3 minutes of work. A little blush from the steam but what else do I find in the neck pocket but hide glue! Victory! I am SO happy that this didn't require an act of divine intervention to remove. What I think happened and the reason for the filler and the finish on the edge of the extension is that a previous repair person might've started to separate the extension but then backed off after realizing that he wasn't quite up to the task. So to hide where he had chewed up the edges so badly he filled it and touched it up with the finish. At least he didn't proceed any further. Some neat tidbits on this one. This is part of why I like this job. I'm assuming these are score lines from the factory when they glued it up back in 55. I've seen these kind of lines on fingerboards and bridge occasionally from the same era on other guitars. Just manufacturing and the knowledge of the day. You can also see the missing chunks of ebony on the edges from the previous work. And my favorite part of this one so far. The original penciled in serial number matching this neck to this body. Serial is dead on for 1955. I love the little "human" touches on things like this. I was *very* careful to only scrape back the glue off the dovetail and not remove this. Maybe the next guy that pulls this neck off in hopefully a few decades will appreciate it like I do. Neck is going to dry out overnight. I'll do the actual cutting tomorrow and rough out a bridge blank. All for now. |
Author: | SteveSmith [ Wed Nov 28, 2018 11:02 pm ] |
Post subject: | Re: 1955 Martin D-28 Repair |
Great that the neck came off good. That's a nice old guitar, makes sense that the owner wants it to play good. |
Author: | FlyingFred [ Thu Nov 29, 2018 9:28 am ] |
Post subject: | Re: 1955 Martin D-28 Repair |
Please keep us abreast of all interesting repairs like this!!! This is amazing. |
Author: | DanKirkland [ Tue Dec 11, 2018 8:02 pm ] |
Post subject: | Re: 1955 Martin D-28 Repair |
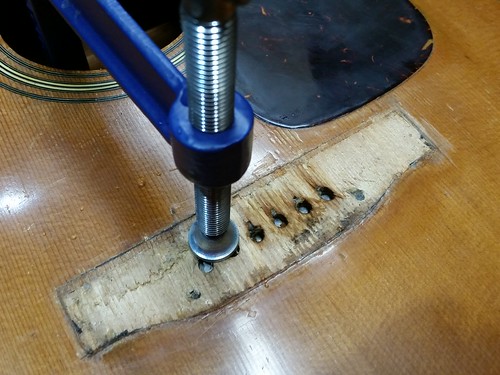
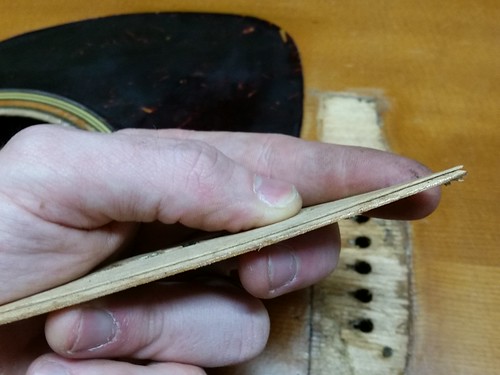
Update time! Back from vacation so I finally had a chance to get some more work done on this one. A quick thing too. I was browsing through the pictures I had taken of this instrument and I found this one. I think I was documenting how the previous guy had tried to remove the neck but stopped halfway through. The frets were pretty much completely unseated. I really think that he had started to remove them to remove the neck. No way to know now, oh well. Alright on to more important things. Today I removed the bridge plate. I've been using a steam method for this lately and it's working out really well. The original plate had a layer of something glued to it, the ball ends of the strings had basically eaten through the plate into the top. I know some folks don't agree with removing the bridge plate but the original has already been messed with, a replacement is really what's needed here. The steam just makes things move a good bit faster when it comes to heating the plate. The caul gets heated to the point where if I spritz some water onto the surface it instantly evaporates. When you clamp the caul to the top, you spritz a bit of water into the sound holes. The steam gets into the little space between the top and the bridge plate and helps the inner part of the glue bond to break easier. And I just use the little bent chisel that stew mac sells for the removal. I work at it diagonally along the length of the grain and they usually "pop" out. A combination of the steam and the heat usually leads to a pretty clean plate removal. And a little view of the overlay on the plate. It did it's job but it needs to be replaced. They just become twisted and warped after so many years under tension. I also got the neck cut. I decided for this one to do the reset before I did the refret. Mostly because I wanted to make sure the projection is more accurate to what it will be with the new frets installed. Personal preference in this case but it works. Sizing up shims All for now, the guitar is clamped up in the shop right now with the neck and new plate. The work continues tomorrow. |
Author: | SteveSmith [ Wed Dec 12, 2018 9:34 am ] |
Post subject: | Re: 1955 Martin D-28 Repair |
Nice job getting the bridge plate off. Are you screwing the bridge clamp to the bottom of the StewMac caul? |
Author: | Smylight [ Wed Dec 12, 2018 9:37 am ] |
Post subject: | Re: 1955 Martin D-28 Repair |
As always, this is a great thread, very useful to the community. Thanks. Pierre Castonguay Guitares Torvisse |
Author: | jfmckenna [ Wed Dec 12, 2018 4:20 pm ] |
Post subject: | Re: 1955 Martin D-28 Repair |
Funny thing is your bridge removal method actually IS a text book method. I have the Martin repair manual from the 90's that outlines that very procedure. Not many people will do it that way anymore but as you now know it does indeed work. That is beautiful BRW too! |
Author: | DanKirkland [ Wed Dec 12, 2018 8:06 pm ] |
Post subject: | Re: 1955 Martin D-28 Repair |
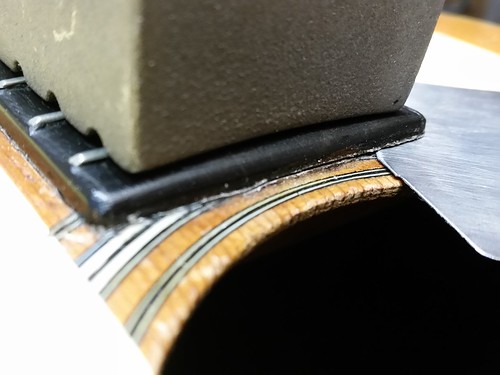
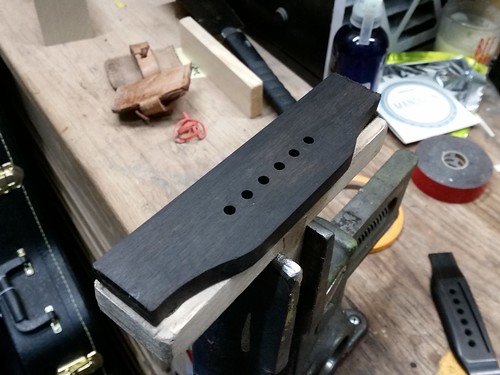
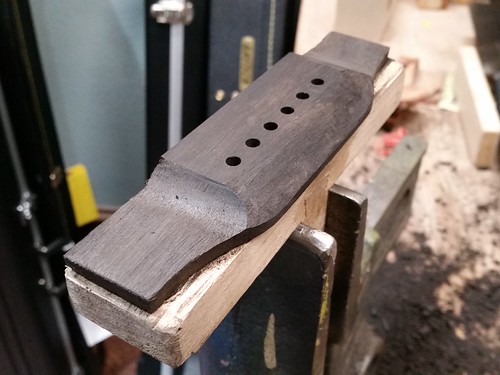
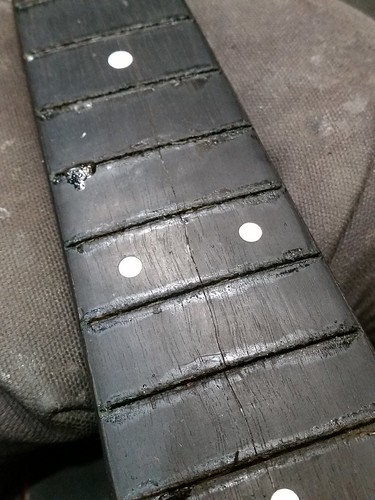
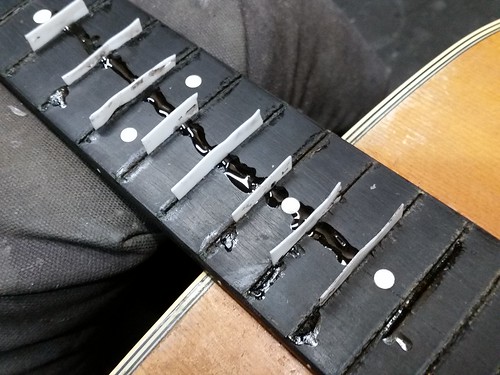
jfmckenna wrote: Funny thing is your bridge removal method actually IS a text book method. I have the Martin repair manual from the 90's that outlines that very procedure. Not many people will do it that way anymore but as you now know it does indeed work. That is beautiful BRW too! I learned it from that very manual! I never employ it except in cases like this where there's not much chance of damaging the finish. It's very effective if just a slight bit nerve racking. And yes this is arguably one of the best sets of BRW I've seen in a very long time. Update time! Today was bridge carving day. I really want a few power tools for this but the handtool method works decently well for my closet shop. With some saws/chisels/planes.files a square and a template to work from (I bought one of the stew mac pre-made Martin bridges to use as a guide for these) I cut it from the ebony I had picked before. Just my preference but I drill my pin holes first and then cut the bridge to fit the footprint on the top. And for something I noticed today while doing the bridge work. This is the pre-made template bridge that's a standard Martin footprint. The previous bridge was glued on so far forward that it was on top of the finish and left a nasty glue line. Kind of goofy looking, sadly my replacement will have to be slightly oversized to help cover this. I really hate anything to do with oversized bridges but in this case I was specifically asked by the client to do this so I'll do it for this one. So while my replacement bridge was clamped and gluing I decided to address the frets. Let me put it simply, this fretboard was ROUGH. Every single fret had evidence of chips caused by a previous refret. After the frets had been pulled I set about filling all of the lost wood. There is also some significant twist that I will have to plane out to make the refret work properly. Luckily the fretboards on these mid-50s dreads are mega thick so the difference won't be noticable when it's string up. One of the more serious issues with this board was this crack running through the center. To fix it I simply treated it like it was another chip out of the fretboard. Fill it with ebony dust, then thin CA glue. Followed by a top layer of thick CA glue which was then planed down flush to the board. After it's done it's practically invisible. Filling the chips in the fretboard took nearly 2 hours on it's own. Not only was I filling chips that I caused but also chips left from the previous refret. After the fills had been made I went through and got ready for the compression refret. This neck didn't have a massive amount of relief surprisingly but it did have a significant twist. I call it 2x4ing when the neck does this sort of thing. It's nearly impossible to photograph but basically the treble side at the nut was about 1/32" higher than the bass side. This caused a massive amount of "false relief" I guess we could call it. The middle of the fretboard on the treble side had wicked high action and was buzzing everywhere. The inverse was happening on the bass side in the middle of the neck. I sanded the sections down diagonally from each other and this easily took care of the difference in height. Touched up with a radius block and all was well. Flattening the fingerboard along with the neck reset was the most needed thing on this guitar. Poor guy had been playing it with a massive action difference for years. Now the projection is nice and high, with a saddle that will be tall and strong. To save a little time for tomorrow I went ahead and refretted the fingerboard extension portion of the neck. The real work needs to occur between frets 1-13. With the 14th fret on I can easily intonate for the saddle without having to have the whole thing fretted.That'll happen tomorrow once the bridge is dry. All for now |
Author: | Goodin [ Wed Dec 12, 2018 8:39 pm ] |
Post subject: | Re: 1955 Martin D-28 Repair |
jfmckenna wrote: Funny thing is your bridge removal method actually IS a text book method. I have the Martin repair manual from the 90's that outlines that very procedure. Not many people will do it that way anymore but as you now know it does indeed work. That's what I was thinking too! This method was described in Don Teeter's repair book, 1974. Nice work Dan. Looking good. |
Author: | DanKirkland [ Wed Dec 12, 2018 10:20 pm ] |
Post subject: | Re: 1955 Martin D-28 Repair |
SteveSmith wrote: Nice job getting the bridge plate off. Are you screwing the bridge clamp to the bottom of the StewMac caul? I missed your question earlier Steve. I actually don't have it drilled and tapped yet. Been meaning to do that just haven't had the chance yet. |
Author: | J De Rocher [ Wed Dec 12, 2018 11:59 pm ] |
Post subject: | Re: 1955 Martin D-28 Repair |
I hope your client gets to see this thread so he can appreciate all the work that you are putting into his guitar. Does every good repair shop have its very own Neck Removal Thingy® Pat. Pending? |
Author: | DanKirkland [ Sun Dec 16, 2018 6:25 pm ] |
Post subject: | Re: 1955 Martin D-28 Repair |
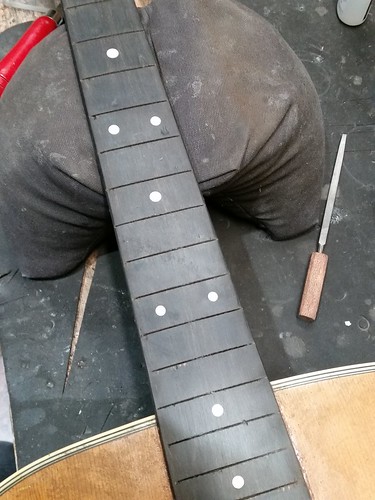
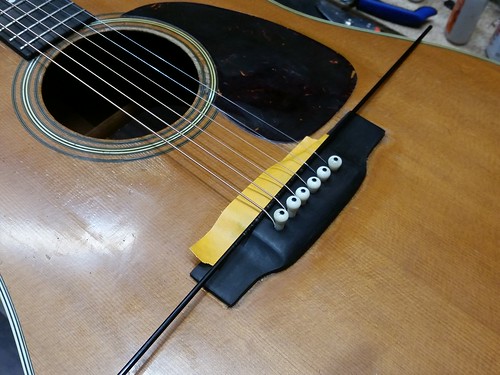
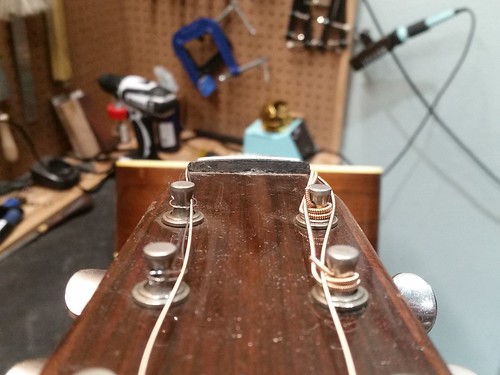
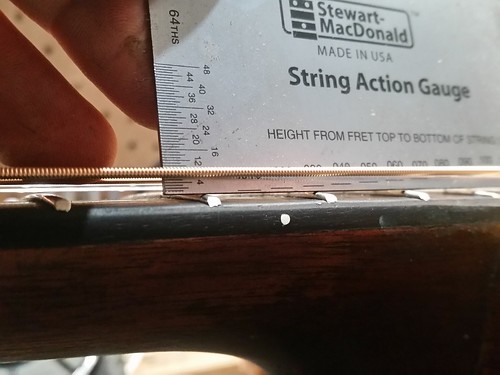
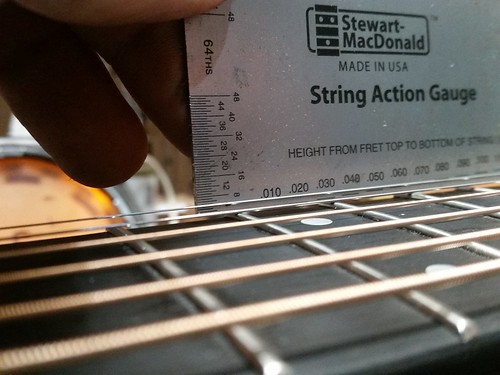
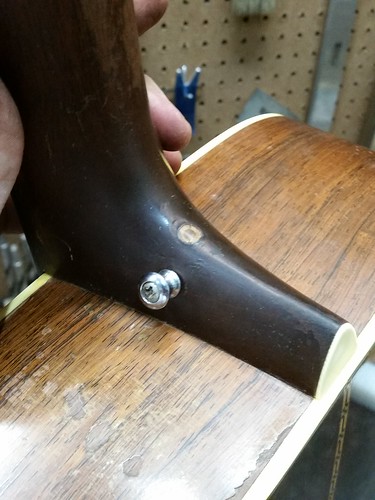
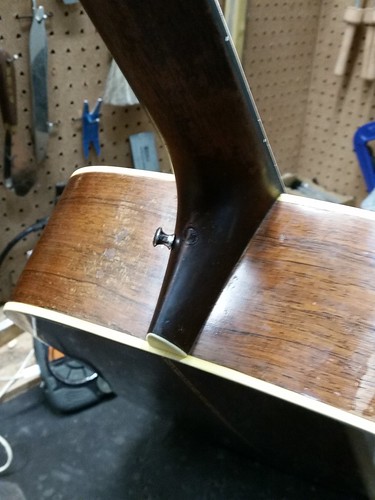
J De Rocher wrote: I hope your client gets to see this thread so he can appreciate all the work that you are putting into his guitar. Does every good repair shop have its very own Neck Removal Thingy® Pat. Pending? I'll consider that. He basically gave me the all clear to do whatever was needed to make it work like a champ again. And yes, as far as I know every shop has their own version of that tool So update time! I actually finished the guitar over the weekend. I'll just put little summaries for each job that was done. Slotting the bridge. My client and I talked about whether to go with a period correct through saddle or a captured saddle. He actually decided to go with a captured saddle, and even with this setup it'd be very easy to convert it to a through saddle should someone in the future want to make it vintage correct. However for simplicity's sake the captured saddle will make future action adjustments much easier for your average tech. I used my usual 1/8" rod method. This method works well for me since I can actually play the guitar and see how good the intonation will be with it actually strung to pitch. Plus there's no guessing when it comes to how it will intonate when being played like a normal human. once the intonation is good with the rod I add the tape to have a reference point. This bright orange tape is the bomb diggity when it comes to doing this. It's such a stark contrast against the ebony that I can easily get the little stew mac saddle slotting jig lined up exactly where I want it. I cut into the tape *slightly* on each end to make sure I have the saddle cut to length. I can deal with a saddle that's a little longer than normal but ones that are cut too short annoy me. With the refret I also had a fair amount of twist to remove on the treble side. It was causing such wonky action it was unplayable in the middle. Like an idiot I forgot to get a picture of the fretboard before I removed the twist. But you can see how much material had to go to help flatten things out. And with the compression refret done (turned out great which made me very happy) the action is right where I wanted it. This is with a high saddle. I had not done the final finish work on the fret ends at this point which is why they look rough. I save that for the very last bit. And with the new saddle giving a much stronger break angle than before the tone and playability have increased dramatically. I ramped the strings slightly more after these pictures were taken just to give a little more clearance for them. And as a final little parting thing there was a nasty little plugged hole from a previous strap button of years ago. I decided to color match it a bit to blend with the rest of the guitar. Doesn't hide it completely but it's better than being unfinished. And I realized an hour after the client picked up the guitar that I hadn't gotten a final shot, but I did manage to find a few minutes to record a little sound clip of the instrument with everything completed. https://www.flickr.com/gp/66953151@N05/owf301 All said and done the client was very pleased. I have to say that it's one of my favorite old Martin's that I've had the pleasure to work on. I hope that the owner plays it loud and proud for a long time to come. This was a really rewarding one to do, hopefully another old 50s Martin will come my way soon. |
Author: | Smylight [ Sun Dec 16, 2018 6:38 pm ] |
Post subject: | Re: 1955 Martin D-28 Repair |
This, my man Dan, is one of the most informative posts of all time. You are doing a great service to the community, keep 'em coming. Every job is different from the previous ones, so documenting as you have been doing is awesome. I'd love to send a beer your way. Pierre Castonguay Guitares Torvisse |
Author: | SteveSmith [ Sun Dec 16, 2018 9:45 pm ] |
Post subject: | Re: 1955 Martin D-28 Repair |
Nice work Dan and a nice old guitar for sure. |
Author: | mountain whimsy [ Tue Dec 18, 2018 11:02 am ] |
Post subject: | Re: 1955 Martin D-28 Repair |
Nice work and nice playing! I continue to learn from every one of these threads! |
Author: | Johny [ Tue Dec 18, 2018 11:54 pm ] |
Post subject: | Re: 1955 Martin D-28 Repair |
Good job! |
Author: | DanKirkland [ Wed Dec 19, 2018 8:41 pm ] |
Post subject: | Re: 1955 Martin D-28 Repair |
Smylight wrote: This, my man Dan, is one of the most informative posts of all time. You are doing a great service to the community, keep 'em coming. Every job is different from the previous ones, so documenting as you have been doing is awesome. I'd love to send a beer your way. Pierre Castonguay Guitares Torvisse That's some very kind words and thank you for saying that. And thank you Steve Johny and Tony for the compliments as well. |
Author: | Smylight [ Thu Dec 20, 2018 8:37 am ] |
Post subject: | Re: 1955 Martin D-28 Repair |
DanKirkland wrote: That's some very kind words and thank you for saying that. And thank you Steve Johny and Tony for the compliments as well. Please keep on doing this. And Happy Christmas to you! Pierre Castonguay Guitares Torvisse |
Author: | jfmckenna [ Thu Dec 20, 2018 9:50 am ] |
Post subject: | Re: 1955 Martin D-28 Repair |
Hey dan, for bridge plate removal you said, "When you clamp the caul to the top, you spritz a bit of water into the sound holes." Did you mean to say through the bridge pin holes? |
Author: | DanKirkland [ Thu Dec 20, 2018 7:55 pm ] |
Post subject: | Re: 1955 Martin D-28 Repair |
jfmckenna wrote: Hey dan, for bridge plate removal you said, "When you clamp the caul to the top, you spritz a bit of water into the sound holes." Did you mean to say through the bridge pin holes? Yes that's what I meant, that was a big mis-type on my part apologies for that. That'd be a challenge from another dimension to do that. So yes, as soon as the heated caul is clamped to the bridge plate (clamped fairly hard too) I spritz water into the pin holes to create steam. |
Page 1 of 2 | All times are UTC - 5 hours |
Powered by phpBB® Forum Software © phpBB Group http://www.phpbb.com/ |